废话不多说,直接上代码:
先看WaterfallCollectionLayout.m
#import "WaterfallCollectionLayout.h"#define colMargin 5#define colCount 4#define rolMargin 5@interface WaterfallCollectionLayout ()//数组存放每列的总高度@property(nonatomic,strong)NSMutableArray* colsHeight;//单元格宽度@property(nonatomic,assign)CGFloat colWidth;@end该类要重写以下方法:
//完成布局前的初始工作-(void)prepareLayout;//collectionView的内容尺寸-(CGSize)collectionViewContentSize;//为每个item设置属性-(UICollectionViewLayoutAttributes *)layoutAttributesForItemAtIndexPath:(NSIndexPath *)indexPath;//获取制定范围的所有item的属性-(NSArray<UICollectionViewLayoutAttributes *> *)layoutAttributesForElementsInRect:(CGRect)rect;-(BOOL)shouldInvalidateLayoutForBoundsChange:(CGRect)newBounds;每次调用会清空colsHeight数组里的信息:
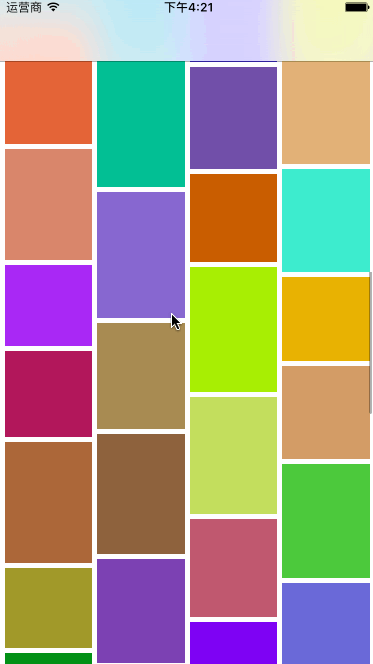
//完成布局前的初始工作-(void)prepareLayout{[super prepareLayout];self.colWidth =( self.collectionView.frame.size.width - (colCount+1)*colMargin )/colCount;//让它重新加载self.colsHeight = nil;}通过遍历colHeight数组里的所有列来获得最长的那一列,返回contentsize//collectionView的内容尺寸-(CGSize)collectionViewContentSize{NSNumber * longest = self.colsHeight[0];for (NSInteger i =0;i<self.colsHeight.count;i++) {NSNumber* rolHeight = self.colsHeight[i];if(longest.floatValue<rolHeight.floatValue){longest = rolHeight;}}return CGSizeMake(self.collectionView.frame.size.width, longest.floatValue);}每个cell要出来时这个方法会被调用,在此方法中设置该cell的frame。//为每个item设置属性-(UICollectionViewLayoutAttributes *)layoutAttributesForItemAtIndexPath:(NSIndexPath *)indexPath{UICollectionViewLayoutAttributes* attr = [UICollectionViewLayoutAttributes layoutAttributesForCellWithIndexPath:indexPath];NSNumber * shortest = self.colsHeight[0];NSInteger shortCol = 0;for (NSInteger i =0;i<self.colsHeight.count;i++) {NSNumber* rolHeight = self.colsHeight[i];if(shortest.floatValue>rolHeight.floatValue){shortest = rolHeight;shortCol=i;}}CGFloat x = (shortCol+1)*colMargin+ shortCol * self.colWidth;CGFloat y = shortest.floatValue+colMargin;//获取cell高度CGFloat height=0;NSAssert(self.heightBlock!=nil, @"未实现计算高度的block ");if(self.heightBlock){height = self.heightBlock(indexPath);}attr.frame= CGRectMake(x, y, self.colWidth, height);self.colsHeight[shortCol]=@(shortest.floatValue+colMargin+height);return attr;}//获取所有item的属性-(NSArray<UICollectionViewLayoutAttributes *> *)layoutAttributesForElementsInRect:(CGRect)rect{NSMutableArray* array = [NSMutableArray array];NSInteger items = [self.collectionView numberOfItemsInSection:0];for (int i = 0; i<items;i++) {UICollectionViewLayoutAttributes* attr = [self layoutAttributesForItemAtIndexPath:[NSIndexPath indexPathForItem:i inSection:0]];[array addObject:attr];}return array;}实现下列方法会在出现新的cell时重新布局并调用preparelayout方法-(BOOL)shouldInvalidateLayoutForBoundsChange:(CGRect)newBounds{return YES;}每列高度的存放,初始高度可以改,我这里是0-(NSMutableArray *)colsHeight{if(!_colsHeight){NSMutableArray * array = [NSMutableArray array];for(int i =0;i<colCount;i++){//这里可以设置初始高度[array addObject:@(0)];}_colsHeight = [array mutableCopy];}return _colsHeight;}再来看看控制器里就是这么简单#pragma mark getter-setter-(UICollectionView *)collectionView{if(!_collectionView){_collectionView = [[UICollectionView alloc]initWithFrame:self.view.frame collectionViewLayout:self.layout];_collectionView.backgroundColor = [UIColor whiteColor];_collectionView.delegate=self;_collectionView.dataSource=self;[_collectionView registerClass:[CollectionViewCell class] forCellWithReuseIdentifier:identifer];}return _collectionView;}-(UICollectionViewLayout *)layout{if(!_layout){_layout = [[WaterfallCollectionLayout alloc]initWithItemsHeightBlock:^CGFloat(NSIndexPath *index) {return [self.heightArr[index.item] floatValue];}];}return _layout;}-(NSArray *)heightArr{if(!_heightArr){//随机生成高度NSMutableArray *arr = [NSMutableArray array];for (int i = 0; i<100; i++) {[arr addObject:@(arc4random()%50+80)];}_heightArr = [arr copy];}return _heightArr;}关于瀑布流的文章特别多,本文就是为大家分享了IOS简单实现瀑布流的方法,希望对大家的学习有所帮助。