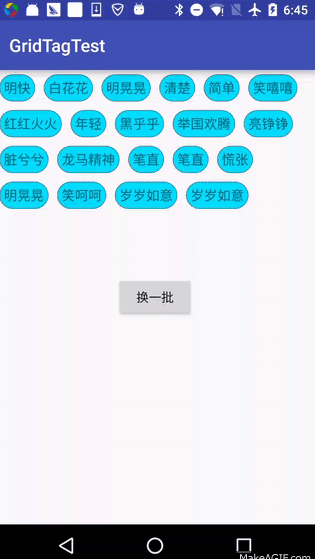
这个是我实现的效果图
原理介绍
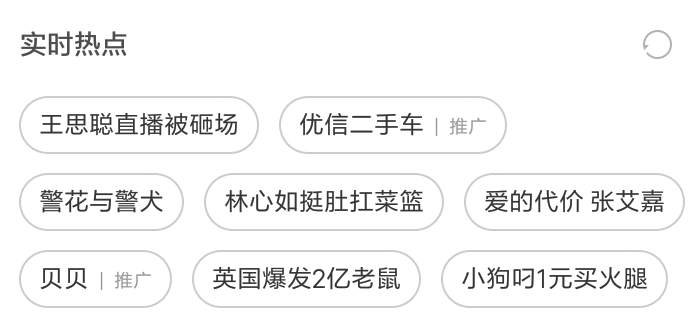
根据对整个控件的效果分析,大致可以将控件分别从以下这几个角度进行分析:
1.首先涉及到自定义的ViewGroup,因为现有的控件没法满足我们的布局效果,就涉及到要重写onMeasure和onLayout,这里需要注意的问题是自定义View的时候,我们需要考虑到View的Padding属性,而在自定义ViewGroup中我们需要在onLayout中考虑Child控件的margin属性否则子类设置这个属性将会失效。整个View的绘制流程是这样的:
最顶层的ViewRoot执行performTraversals然后分别开始对各个View进行层级的测量、布局、绘制,整个流程是一层一层进行的,也就是说父视图测量时会调用子视图的测量方法,子视图调孙视图方法,一直测量到叶子节点,performTraversals这个函数翻译过来很直白,执行遍历,就说明了这种层级关系。
2.该控件形式上和ListView的形式比较相近,所以在这里我也模仿ListView的Adapter模式实现了对控件内容的操作,这里对ListView的setAdapter和Adapter的notifyDataSetChanged方法做个简单的解释:
在ListView调用setAdapter后,ListView会去注册一个Observer对象到这个adapter上,然后当我们在改变设置到adapter上的数据发改变时,我们会调用adapter的notifyDataSetChanged方法,这个方法就会通知所有监听了该Adapter数据改变时的Observer对象,这就是典型的监听者模式,这时由于ListView中的内部成员对象监听了该事件,就可以知道数据源发生了改变,我们需要对真个控件重新进行绘制了,下面来一些相关的源码。
Adapter的notifyDataSetChanged
public void notifyDataSetChanged() {mDataSetObservable.notifyChanged();}ListView的setAdapter方法@Overridepublic void setAdapter(ListAdapter adapter) {/** *每次设置新的适配的时候,如果现在有的话会做一个解除监听的操作 */if (mAdapter != null && mDataSetObserver != null) {mAdapter.unregisterDataSetObserver(mDataSetObserver);}resetList();mRecycler.clear();/** 省略部分代码.....*/if (mAdapter != null) {mAreAllItemsSelectable = mAdapter.areAllItemsEnabled();mOldItemCount = mItemCount;mItemCount = mAdapter.getCount();checkFocus();/***在这里对adapter设置了监听,*使用的是AdapterDataSetObserver类的对象,该对象定义在ListView的父类AdapterView中*/mDataSetObserver = new AdapterDataSetObserver();mAdapter.registerDataSetObserver(mDataSetObserver);/** 省略 */} else {/** 省略 */}requestLayout();}AdapterView中的内部类AdapterDataSetObserverclass AdapterDataSetObserver extends DataSetObserver {private Parcelable mInstanceState = null;@Overridepublic void onChanged() {/* ***代码略*** */checkFocus();requestLayout();}@Overridepublic void onInvalidated() {/* ***代码略*** */checkFocus();requestLayout();}public void clearSavedState() {mInstanceState = null;}}一段伪代码表示ListView{Observer observer{ onChange(){ change; }}setAdapter(Adapter adapter){ adapter.register(observer);}}Adapter{List<Observer> mObservable;register(observer){mObservable.add(observer);}notifyDataSetChanged(){for(i-->mObserverable.size()){mObserverable.get(i).onChange}}}实现过程package humoursz.gridtag.test.adapter;import android.view.View;import java.util.List;/** * Created by zhangzhiquan on 2016/7/19. */public interface GrideTagBaseAdapter {List<View> getViews();}抽象适配器AbsGridTagsAdapterpackage humoursz.gridtag.test.adapter;import android.database.DataSetObservable;import android.database.DataSetObserver;/** * Created by zhangzhiquan on 2016/7/19. */public abstract class AbsGridTagsAdapter implements GrideTagBaseAdapter {DataSetObservable mObservable = new DataSetObservable();public void notification(){mObservable.notifyChanged();}public void registerObserve(DataSetObserver observer){mObservable.registerObserver(observer);}public void unregisterObserve(DataSetObserver observer){mObservable.unregisterObserver(observer);}}此效果中的需要的适配器,实现了getView接口,主要是模仿了ListView的BaseAdapterpackage humoursz.gridtag.test.adapter;import android.content.Context;import android.view.LayoutInflater;import android.view.View;import android.widget.TextView;import java.util.ArrayList;import java.util.List;import humoursz.gridtag.test.R;import humoursz.gridtag.test.util.UIUtil;import humoursz.gridtag.test.widget.GridTagView;/** * Created by zhangzhiquan on 2016/7/19. */public class MyGridTagAdapter extends AbsGridTagsAdapter {private Context mContext;private List<String> mTags;public MyGridTagAdapter(Context context, List<String> tags) {mContext = context;mTags = tags;}@Overridepublic List<View> getViews() {List<View> list = new ArrayList<>();for (int i = 0; i < mTags.size(); i++) {TextView tv = (TextView) LayoutInflater.from(mContext).inflate(R.layout.grid_tag_item_text, null);tv.setText(mTags.get(i));GridTagView.LayoutParams lp = new GridTagView.LayoutParams(GridTagView.LayoutParams.WRAP_CONTENT,GridTagView.LayoutParams.WRAP_CONTENT);lp.margin(UIUtil.dp2px(mContext, 5));tv.setLayoutParams(lp);list.add(tv);}return list;}}最后是主角GridTagsView控件package humoursz.gridtag.test.widget;import android.content.Context;import android.database.DataSetObserver;import android.util.AttributeSet;import android.util.Log;import android.view.View;import android.view.ViewGroup;import java.util.List;import humoursz.gridtag.test.adapter.AbsGridTagsAdapter;/** * Created by zhangzhiquan on 2016/7/18. */public class GridTagView extends ViewGroup {private int mLines = 1;private int mWidthSize = 0;private AbsGridTagsAdapter mAdapter;private GTObserver mObserver = new GTObserver();public GridTagView(Context context) {this(context, null);}public GridTagView(Context context, AttributeSet attrs) {this(context, attrs, 0);}public GridTagView(Context context, AttributeSet attrs, int defStyleAttr) {super(context, attrs, defStyleAttr);}public void setAdapter(AbsGridTagsAdapter adapter) {if (mAdapter != null) {mAdapter.unregisterObserve(mObserver);}mAdapter = adapter;mAdapter.registerObserve(mObserver);mAdapter.notification();}@Overrideprotected void onMeasure(int widthMeasureSpec, int heightMeasureSpec) {int widthSize = MeasureSpec.getSize(widthMeasureSpec);int heightSize = MeasureSpec.getSize(heightMeasureSpec);int curWidthSize = 0;int childHeight = 0;mLines = 1;for (int i = 0; i < getChildCount(); ++i) {View child = getChildAt(i);measureChild(child, widthMeasureSpec, heightMeasureSpec);curWidthSize += getChildRealWidthSize(child);if (curWidthSize > widthSize) {/** * 计算一共需要多少行,用于计算控件的高度 * 计算方法是,如果当前控件放下后宽度超过 * 容器本身的高度,就放到下一行 */curWidthSize = getChildRealWidthSize(child);mLines++;}if (childHeight == 0) {/** * 在第一次计算时拿到字视图的高度作为计算基础 */childHeight = getChildRealHeightSize(child);}}mWidthSize = widthSize;setMeasuredDimension(widthSize, childHeight == 0 ? heightSize : childHeight * mLines);}@Overrideprotected void onLayout(boolean changed, int l, int t, int r, int b) {if (getChildCount() == 0)return;int childCount = getChildCount();LayoutParams lp = getChildLayoutParams(getChildAt(0));/** * 初始的左边界在自身的padding left和child的margin后 * 初始的上边界原理相同 */int left = getPaddingLeft() + lp.leftMargin;int top = getPaddingTop() + lp.topMargin;int curLeft = left;for (int i = 0; i < childCount; ++i) {View child = getChildAt(i);int right = curLeft + getChildRealWidthSize(child);/** * 计算如果放下当前试图后整个一行到右侧的距离 * 如果超过控件宽那就放到下一行,并且左边距还原,上边距等于下一行的开始 */if (right > mWidthSize) {top += getChildRealHeightSize(child);curLeft = left;}child.layout(curLeft, top, curLeft + child.getMeasuredWidth(), top + child.getMeasuredHeight());/** * 下一个控件的左边开始距离是上一个控件的右边 */curLeft += getChildRealWidthSize(child);}}/** * 获取childView实际占用宽度 * @param child * @return 控件实际占用的宽度,需要算上margin否则margin不生效 */private int getChildRealWidthSize(View child) {LayoutParams lp = getChildLayoutParams(child);int size = child.getMeasuredWidth() + lp.leftMargin + lp.rightMargin;return size;}/** * 获取childView实际占用高度 * @param child * @return 实际占用高度需要考虑上下margin */private int getChildRealHeightSize(View child) {LayoutParams lp = getChildLayoutParams(child);int size = child.getMeasuredHeight() + lp.topMargin + lp.bottomMargin;return size;}/** * 获取LayoutParams属性 * @param child * @return */private LayoutParams getChildLayoutParams(View child) {LayoutParams lp;if (child.getLayoutParams() instanceof LayoutParams) {lp = (LayoutParams) child.getLayoutParams();} else {lp = (LayoutParams) generateLayoutParams(child.getLayoutParams());}return lp;}@Overridepublic ViewGroup.LayoutParams generateLayoutParams(AttributeSet attr) {return new LayoutParams(getContext(), attr);}@Overrideprotected ViewGroup.LayoutParams generateLayoutParams(ViewGroup.LayoutParams p) {return new LayoutParams(p);}public static class LayoutParams extends MarginLayoutParams {public LayoutParams(Context c, AttributeSet attrs) {super(c, attrs);}public LayoutParams(int width, int height) {super(width, height);}public LayoutParams(MarginLayoutParams source) {super(source);}public LayoutParams(ViewGroup.LayoutParams source) {super(source);}public void marginLeft(int left) {this.leftMargin = left;}public void marginRight(int r) {this.rightMargin = r;}public void marginTop(int t) {this.topMargin = t;}public void marginBottom(int b) {this.bottomMargin = b;}public void margin(int m){this.leftMargin = m;this.rightMargin = m;this.topMargin = m;this.bottomMargin = m;}}private class GTObserver extends DataSetObserver {@Overridepublic void onChanged() {removeAllViews();List<View> list = mAdapter.getViews();for (int i = 0; i < list.size(); i++) {addView(list.get(i));}}@Overridepublic void onInvalidated() {Log.d("Mrz","fd");}}}MainActivitypackage humoursz.gridtag.test;import android.support.v7.app.AppCompatActivity;import android.os.Bundle;import android.view.View;import java.util.List;import humoursz.gridtag.test.adapter.MyGridTagAdapter;import humoursz.gridtag.test.util.ListUtil;import humoursz.gridtag.test.widget.GridTagView;public class MainActivity extends AppCompatActivity {MyGridTagAdapter adapter;GridTagView mGridTag;List<String> mList;@Overrideprotected void onCreate(Bundle savedInstanceState) {super.onCreate(savedInstanceState);setContentView(R.layout.activity_main);mGridTag = (GridTagView)findViewById(R.id.grid_tags);mList = ListUtil.getGridTagsList(20);adapter = new MyGridTagAdapter(this,mList);mGridTag.setAdapter(adapter);}public void onClick(View v){mList.removeAll(mList);mList.addAll(ListUtil.getGridTagsList(20));adapter.notification();}}XML 文件<?xml version="1.0" encoding="utf-8"?><RelativeLayout xmlns:android="http://schemas.android.com/apk/res/android"xmlns:tools="http://schemas.android.com/tools"android:layout_width="match_parent"android:layout_height="match_parent"tools:context="humoursz.gridtag.test.MainActivity"><humoursz.gridtag.test.widget.GridTagViewandroid:id="@+id/grid_tags"android:layout_width="match_parent"android:layout_height="wrap_content"></humoursz.gridtag.test.widget.GridTagView><Buttonandroid:layout_centerInParent="true"android:layout_width="wrap_content"android:layout_height="wrap_content"android:onClick="onClick"android:text="换一批"/></RelativeLayout>以上就是Android中标签容器控件的全部实现过程,这样一个简单的控件就写好了,主要需要注意measure和layout否则很多效果都会失效,安卓中的LinearLayout之类的控件实际实现起来要复杂的很多,因为支持的属性实在的太多了,多动手实践可以帮助理解,希望本文能帮助到在Android开发中的大家。