使用UI Router,它能内嵌状态,为每个状态显示不同的view,我们能让多步表单变得相当的容易。
为了快速的理解UI Router是怎样工作的,看我们的文章:AngularJS使用UI-Router路由
让我们言归正传,开始创建我们的最棒的表单!
创建工程
创建工程有个模板结构. 需要个 布局文件 , 每个表单的视图文件, 格式文件, 以及JavaScript 文件.
下面就是文件清单,先创建好它们,接着在填充内容
- index.html- form.html- form-profile.html- form-interests.html- form-payment.html- app.js- style.css每个表单-____.html表示层级结构中的html文件. 这些结构最终创建我们的表单结构.
<!-- index.html --><!DOCTYPE html><html><head><meta charset="utf-8"><!-- CSS --><link rel="stylesheet" href="//netdna.bootstrapcdn.com/bootswatch/3.1.1/darkly/bootstrap.min.css"><link rel="stylesheet" href="style.css"><!-- JS --><!-- load angular, nganimate, and ui-router --><script src="//ajax.googleapis.com/ajax/libs/angularjs/1.2.16/angular.min.js"></script><script src="//cdnjs.cloudflare.com/ajax/libs/angular-ui-router/0.2.10/angular-ui-router.min.js"></script><script src="//ajax.googleapis.com/ajax/libs/angularjs/1.2.16/angular-animate.min.js"></script><script src="app.js"></script></head><!-- apply our angular app --><body ng-app="formApp"><div class="container"><!-- views will be injected here --><div ui-view></div></div></body></html>完成所有文件的引入后,让我们进入 app.js 开始创建Angular应用和最基本的路由配置。 注意我们是如何把Angular App (formApp) 应用到 body 上面的。
<!-- form.html --><div class="row"><div class="col-sm-8 col-sm-offset-2"><div id="form-container"><div class="page-header text-center"><h2>Let"s Be Friends</h2><!-- the links to our nested states using relative paths --><!-- add the active class if the state matches our ui-sref --><div id="status-buttons" class="text-center"><a ui-sref-active="active" ui-sref=".profile"><span>1</span> Profile</a><a ui-sref-active="active" ui-sref=".interests"><span>2</span> Interests</a><a ui-sref-active="active" ui-sref=".payment"><span>3</span> Payment</a></div></div><!-- use ng-submit to catch the form submission and use our Angular function --><form id="signup-form" ng-submit="processForm()"><!-- our nested state views will be injected here --><div id="form-views" ui-view></div></form></div><!-- show our formData as it is being typed --><pre>{{ formData }}</pre></div></div>注意我们是如何第二次在项目中使用ui-view的。这就是UI Router伟大的地方:我们可以嵌套声明和视图。这能够在我们开发应用时提供给我们非常多的灵活性。关于UI Router视图的内容,请参见 官方文档。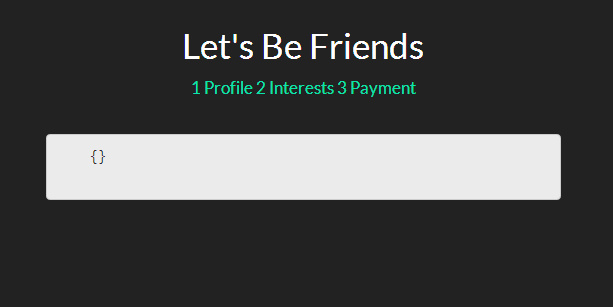
目前为止,我们并没有完全按照希望的那样得到所有的内容,但是这是一系列伟大事情的开端。让我们继续前进,添加一点样式,之后会添加一些嵌入视图和注释。
基础Stylingstyle.css
我们将设计我们的form-container和status-buttons来是我们的表单看起来更好。
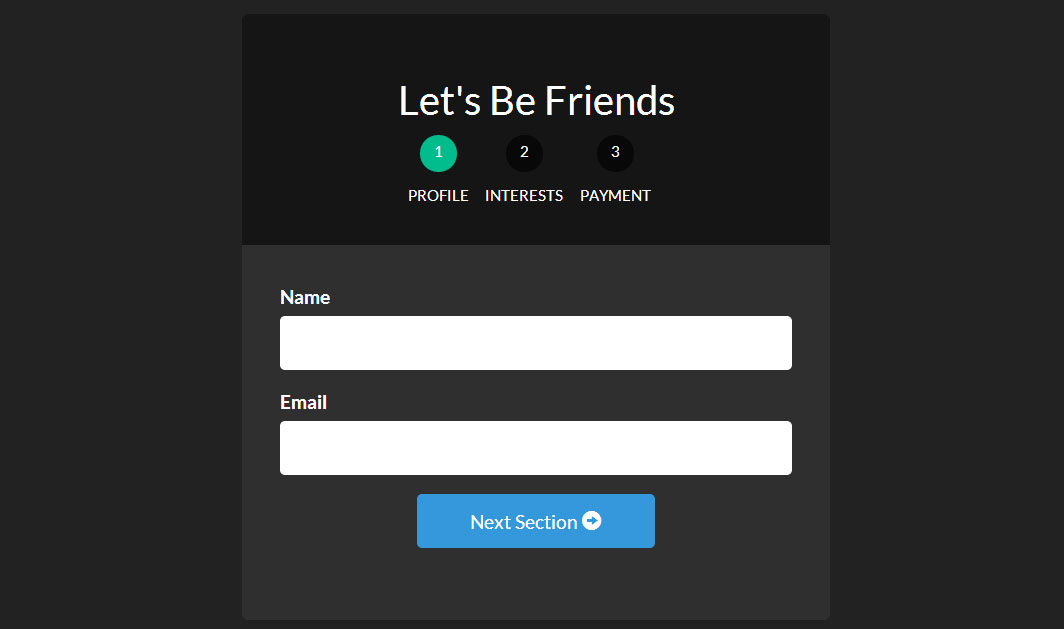
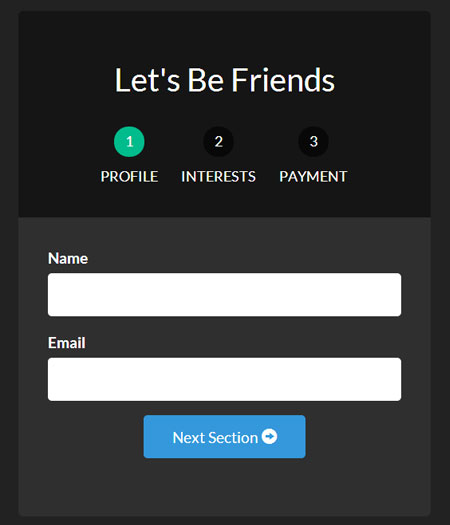
/* style.css *//* BASIC STYLINGS============================================================================= */body{ padding-top:20px; }/* form styling */#form-container{ background:#2f2f2f; margin-bottom:20px;border-radius:5px; }#form-container .page-header{ background:#151515; margin:0; padding:30px; border-top-left-radius:5px; border-top-right-radius:5px; }/* numbered buttons */#status-buttons { }#status-buttons a{ color:#FFF; display:inline-block; font-size:12px; margin-right:10px; text-align:center; text-transform:uppercase; }#status-buttons a:hover { text-decoration:none; }/* we will style the span as the circled number */#status-buttons span{ background:#080808; display:block; height:30px; margin:0 auto 10px; padding-top:5px; width:30px; border-radius:50%; }/* active buttons turn light green-blue*/#status-buttons a.active span{ background:#00BC8C; }现在我们的按钮更好看了并且更符合我们想要的了,接下来我们看下嵌套视图。<!-- form-profile.html --><div class="form-group"><label for="name">Name</label><input type="text" class="form-control" name="name" ng-model="formData.name"></div><div class="form-group"><label for="email">Email</label><input type="text" class="form-control" name="email" ng-model="formData.email"></div><div class="form-group row"><div class="col-xs-6 col-xs-offset-3"><a ui-sref="form.interests" class="btn btn-block btn-info">Next Section <span class="glyphicon glyphicon-circle-arrow-right"></span></a></div></div>表单兴趣视图
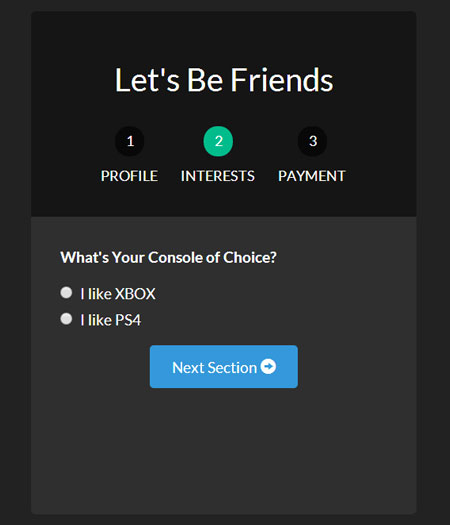
<!-- form-interests.html --><label>What"s Your Console of Choice?</label><div class="form-group"><div class="radio"><label><input type="radio" ng-model="formData.type" value="xbox" checked>I like XBOX</label></div><div class="radio"><label><input type="radio" ng-model="formData.type" value="ps">I like PS4</label></div></div><div class="form-group row"><div class="col-xs-6 col-xs-offset-3"><a ui-sref="form.payment" class="btn btn-block btn-info">Next Section <span class="glyphicon glyphicon-circle-arrow-right"></span></a></div></div>表单支付视图
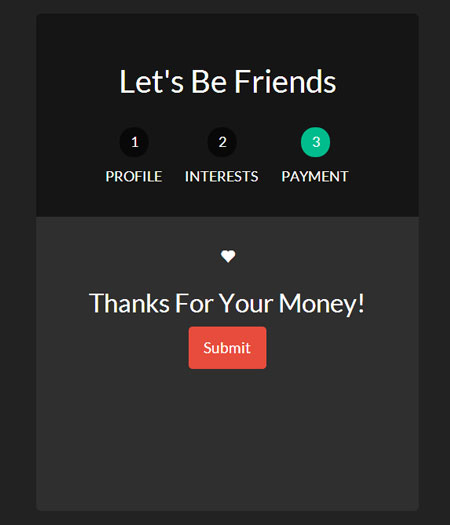
<!-- form-payment.html --><div class="text-center"><span class="glyphicon glyphicon-heart"></span><h3>Thanks For Your Money!</h3><button type="submit" class="btn btn-danger">Submit</button></div>既然我们已经定义了这些视图,那么当我们浏览表单时,他们就会显示出来。同样我们用下一个按钮和ui-sref来连接每一个新视图.
为了让我们的页面不同寻常,让我们加上动画效果。
让我们的表单产生动画效果
因为在项目开始的时候,我们已经加载了ngAnimate,它已经添加到需要动画的的类上了。当视图进入或退出的时候,它将自动添加类ng-enter和ng-leave。
现在我们所有做的就是通过样式形成我们最终的表单。为了理解Angular动画,这篇文章是一个很好的起点。
让我们进去css文件,将动画,并应用到我们的表单上
/* style.css *//* ANIMATION STYLINGS============================================================================= */#signup-form{ position:relative; min-height:300px; overflow:hidden; padding:30px; }#form-views { width:auto; }/* basic styling for entering and leaving *//* left and right added to ensure full width */#form-views.ng-enter,#form-views.ng-leave { position:absolute; left:30px; right:30px;transition:0.5s all ease; -moz-transition:0.5s all ease; -webkit-transition:0.5s all ease; }/* enter animation */#form-views.ng-enter{ -webkit-animation:slideInRight 0.5s both ease;-moz-animation:slideInRight 0.5s both ease;animation:slideInRight 0.5s both ease; }/* leave animation */#form-views.ng-leave{ -webkit-animation:slideOutLeft 0.5s both ease;-moz-animation:slideOutLeft 0.5s both ease;animation:slideOutLeft 0.5s both ease;}/* ANIMATIONS============================================================================= *//* slide out to the left */@keyframes slideOutLeft {to { transform: translateX(-200%); }}@-moz-keyframes slideOutLeft {to { -moz-transform: translateX(-200%); }}@-webkit-keyframes slideOutLeft {to { -webkit-transform: translateX(-200%); }}/* slide in from the right */@keyframes slideInRight {from { transform:translateX(200%); }to { transform: translateX(0); }}@-moz-keyframes slideInRight {from { -moz-transform:translateX(200%); }to { -moz-transform: translateX(0); }}@-webkit-keyframes slideInRight {from { -webkit-transform:translateX(200%); }to { -webkit-transform: translateX(0); }}首先,确定视图离开或进去时,表单的样式,他们是绝对定位的。需要确认当视图进入的时候一个视图不会放到另一个视图的下面。