$ npm install express-generator -g(-g表示全局安装,下次可以直接使用,不用再次安装)
然后安装所有依赖包:
$ npm install启动这个应用(MacOS 或 Linux 平台):
$ DEBUG=myapp npm startWindows 平台使用如下命令:
> set DEBUG=myapp & npm start
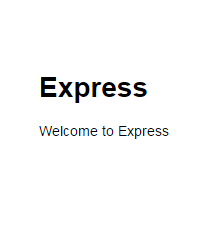
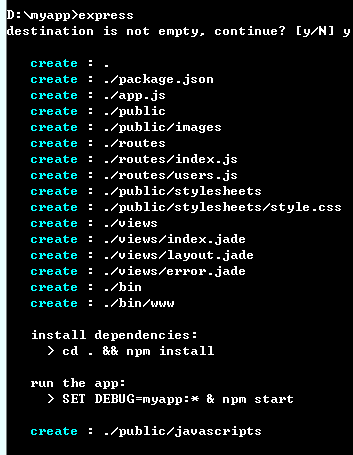
看到这个页面时,大家已经完成了基础的项目构建,继续往上添加自己的代码就可以了。(到这部后大家可以把public目录下的文件夹修改为自己喜欢的格式,例如:js,css,只是一个路径而已)
接下来大家就可以把自己的页面添加到项目里面了,不过express到目前我只发现可以加载jade模板和ejs。大家不用担心还要从新学习jade,这里http://www.html2jade.org/,可以直接用工具把html转化为jade模板,可以让你手中已有的项目直接添加进去,jade模板在express的加载方法:http://www.expressjs.com.cn/guide/using-template-engines.html。其实jade的写法真的很简单,大家看一下api基本就能上手了,学习地址点这里。(项目里已经集成了jade,不用重复安装)
现在大家打开核心的app.js
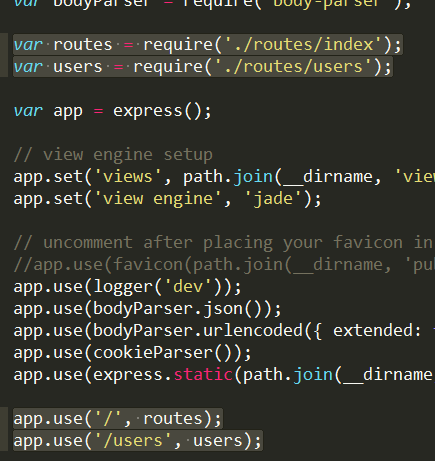
这几行定义的是express的路由,大家可以简单了解下路由的作用,http://www.expressjs.com.cn/guide/routing.html,这点非常重要,一定要理解,不是很难,应该能够很快理解。
比如现在你打开http://localhost:3000/users页面,对应user.js里面的代码一看就能理解。(打开这个页面时发生了get请求)
下面咱们先不急着上传图片,先测试下前端发送的post和get请求。
以post请求为例,咱们把layout.jade修改成下面的样子
doctype htmlhtml head title= title link(rel="stylesheet", href="/css/style.css") script(type="text/javascript", src="/js/jquery.js") script(type="text/javascript", src="/js/index.js") body block content在public/js下新建个index.js,加载jquery(只是为了简写的ajax)有人可能会问为什么会没有public路径,因为Express 内置的 express.static 可以方便地托管静态文件,例如图片、CSS、JavaScript 文件等,详细内容点这里,对应app.js的内容为 app.use(express.static(path.join(__dirname, "public")));
$(document).ready(function() { $.post("/", {num: "12345678"}, function(data) { console.log(data)});}) 然后在routes/index.js里面修改var express = require("express");var router = express.Router();/* GET home page. */router.get("/", function(req, res, next) { res.render("index", { title: "Express" });});router.post("/", function(req, res) {res.send(req.body.num);});module.exports = router; 在此监听首页的post请求,req.body.num表示发送过来的数据,大家可以直接打印下req,看看里面包含了什么内容,加深理解(修改完文件后记得重启express)。
这时候在控制台中就可以看到返回的数据了。
现在大家已经可以使用node接收前端发送的请求了(是不是灰长开心!!),下面进行我们的重头戏,上传图片。
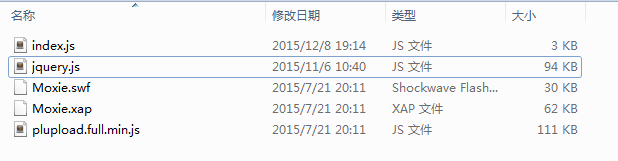
因为是测试接口,公司的项目要兼容低版本浏览器,所有plupload.js就上场了(不是我不想用h5的方法)。官网,下载后如图,就够用了。(记得在layout.jade里面加载)
把index.js修改成下面的样子,这是个标准的官网上传事例,不理解的在官网看下api,很好理解(其实看变量名字也都能理解~)
$(document).ready(function() { var uploader = new plupload.Uploader({ runtimes: "html5,flash,silverlight,html4", browse_button: "pickfiles", // you can pass an id... container: document.getElementById("container"), // ... or DOM Element itself url: "/", flash_swf_url: "../js/Moxie.swf", silverlight_xap_url: "../js/Moxie.xap", filters: { max_file_size: "10mb", mime_types: [{ title: "Image files", extensions: "jpg,gif,png" }, { title: "Zip files", extensions: "zip" }] }, init: { PostInit: function() { document.getElementById("filelist").innerHTML = ""; document.getElementById("uploadfiles").onclick = function() { uploader.start(); return false; }; }, FilesAdded: function(up, files) { plupload.each(files, function(file) { document.getElementById("filelist").innerHTML += "<div id="" + file.id + "">" + file.name + " (" + plupload.formatSize(file.size) + ") <b></b></div>"; }); }, UploadProgress: function(up, file) { document.getElementById(file.id).getElementsByTagName("b")[0].innerHTML = "<span>" + file.percent + "%</span>"; }, Error: function(up, err) { document.getElementById("console").appendChild(document.createTextNode("
Error #" + err.code + ": " + err.message)); }, FileUploaded: function(up, file, info) { // Called when file has finished uploading$("body").append($(info.response))}, UploadComplete: function(up, file) { } } }); uploader.init();}) index.jade修改成下面的样子,主要是添加上传点击的元素,添加了两个按钮而已(不要嫌弃它确实是比较丑--)extends layoutblock content h1= title p Welcome to #{title} #filelist #container a#pickfiles select files a#uploadfiles upload files 这里我们要用到的外部模块是Felix Geisendörfer开发的node-formidable模块。它对解析上传的文件数据做了很好的抽象。 其实说白了,处理文件上传“就是”处理POST数据 —— 但是,麻烦的是在具体的处理细节,所以,这里采用现成的方案更合适点。 npm install formidable修改routes/index.js
var express = require("express");var router = express.Router();var fs = require("fs");var formidable = require("formidable");/* GET home page. */router.get("/", function(req, res) { res.render("index", { title: "孟星魂" });});router.post("/", function(req, res) { var form = new formidable.IncomingForm(); form.uploadDir = "./public/upload/temp/"; //改变临时目录 form.parse(req, function(error, fields, files) { for (var key in files) { var file = files[key]; var fName = (new Date()).getTime(); switch (file.type) { case "image/jpeg": fName = fName + ".jpg"; break; case "image/png": fName = fName + ".png"; break; default: fName = fName + ".png"; break; } console.log(file, file.size); var uploadDir = "./public/upload/" + fName; fs.rename(file.path, uploadDir, function(err) { if (err) { res.write(err + "
"); res.end(); } //res.write("upload image:<br/>"); res.write("<img src="/upload/" + fName + "" />"); res.end(); }) } });});
module.exports = router;