#region Attributepublic List<SelectListItem> TypeSelectList{ get {List<SelectListItem> _items = new List<SelectListItem>();_items.Add(new SelectListItem { Text = CategoryType.一般栏目.ToString(), Value = ((int)CategoryType.一般栏目).ToString() });_items.Add(new SelectListItem { Text = CategoryType.单页栏目.ToString(), Value = ((int)CategoryType.单页栏目).ToString() });_items.Add(new SelectListItem { Text = CategoryType.外部链接.ToString(), Value = ((int)CategoryType.外部链接).ToString() });return _items; }}#endregion其次,用户应该可以选择内容模型,内容模型是什么? using System.ComponentModel.DataAnnotations;namespace Ninesky.Models{ /// <summary> /// 内容模块 /// </summary> public class Module {[Key]public int ModuleId { get; set; }/// <summary>/// 模块名称/// </summary>[Required(ErrorMessage="×")][Display(Name="模块名称")]public string Name { get; set; }/// <summary>/// 模块模型/// </summary>[Required(ErrorMessage = "×")][Display(Name = "模块模型")]public string Model { get; set; }/// <summary>/// 启用模块/// </summary>[Required(ErrorMessage = "×")][Display(Name = "启用模块")]public bool Enable { get; set; }/// <summary>/// 说明/// </summary>[Required(ErrorMessage = "×")][Display(Name = "说明")]public string Description { get; set; } }}既然有模块类,就应该有模块类的数据处理类ModuleRepository,这块功能暂时留在后面来写,先最简单的实现List(bool enable)函数让其能显示模块列表。 using Ninesky.Models;using System.Collections.Generic;using System.Linq;namespace Ninesky.Repository{ public class ModuleRepository {public IQueryable<Module> List(bool enable){ List<Module> _module = new List<Module>(); _module.Add(new Module { Name = "新闻模块", Model = "News", Enable = true, Description = "新闻模块" }); _module.Add(new Module { Name = "文章模块", Model = "Article", Enable = true, Description = "文章模块" }); return _module.AsQueryable();} }}简单吧。模块功能以后再写吧,先为了添加栏目显示两个固定的模块,[AdminAuthorize]public ActionResult ManageAdd(){ ModuleRepository _moduleRsy = new ModuleRepository(); var _modules = _moduleRsy.List(true); List<SelectListItem> _slimodule = new List<SelectListItem>(_modules.Count()); foreach (Module _module in _modules) {_slimodule.Add(new SelectListItem { Text = _module.Name, Value = _module.Model }); } ViewData.Add("Model", _slimodule); ViewData.Add("Type", TypeSelectList); return View();}然后添加添加数据处理函数[AdminAuthorize][HttpPost]public ActionResult ManageAdd(Category category){ categoryRsy = new CategoryRepository(); if (categoryRsy.Add(category)) {Notice _n = new Notice { Title = "添加栏目成功", Details = "您已经成功添加[" + category.Name + "]栏目!", DwellTime = 5, NavigationName = "栏目列表", NavigationUrl = Url.Action("ManageList", "Cayegory") };return RedirectToAction("ManageNotice", "Prompt", _n); } else {Error _e = new Error { Title = "添加栏目失败", Details = "在添加栏目时,未能保存到数据库", Cause = "系统错误", Solution = Server.UrlEncode("<li>返回<a href="" + Url.Action("ManageAdd", "Cayegory") + "">添加栏目</a>页面,输入正确的信息后重新操作</li><li>联系网站管理员</li>") };return RedirectToAction("ManageError", "Prompt", _e); }}现在开始做视图部分了。@model Ninesky.Models.Category@{ ViewBag.Title = "ManageAdd"; Layout = "~/Views/Layout/_Manage.cshtml";}<div class="left"> <div class="top"></div> 左侧列表</div><div class="split"></div><div class="workspace"> <div class="inside"><div class="notebar"> <img alt="" src="~/Skins/Default/Manage/Images/Category.gif" />添加栏目</div>@using (Html.BeginForm()){ @Html.ValidationSummary(true) <fieldset><legend>栏目</legend><ul> <li><div class="editor-label"> @Html.LabelFor(model => model.Type)</div><div class="editor-field"> @Html.DropDownList("Type") @Html.ValidationMessageFor(model => model.Type) @Html.DisplayDescriptionFor(model => model.Type)</div> </li> <li><div class="editor-label"> @Html.LabelFor(model => model.Name)</div><div class="editor-field"> @Html.EditorFor(model => model.Name) @Html.ValidationMessageFor(model => model.Name) @Html.DisplayDescriptionFor(model => model.Name)</div> </li> <li><div class="editor-label"> @Html.LabelFor(model => model.ParentId)</div><div class="editor-field"> @Html.EditorFor(model => model.ParentId) @Html.ValidationMessageFor(model => model.ParentId) @Html.DisplayDescriptionFor(model => model.ParentId)</div> </li> <li id="li_model"><div class="editor-label"> @Html.LabelFor(model => model.Model)</div><div class="editor-field"> @Html.DropDownList("Model") @Html.ValidationMessageFor(model => model.Model) @Html.DisplayDescriptionFor(model => model.Model)</div> </li> <li id="li_categoryview"><div class="editor-label"> @Html.LabelFor(model => model.CategoryView)</div><div class="editor-field"> @Html.EditorFor(model => model.CategoryView) @Html.ValidationMessageFor(model => model.CategoryView) @Html.DisplayDescriptionFor(model => model.CategoryView)</div> </li> <li id="li_contentview"><div class="editor-label"> @Html.LabelFor(model => model.ContentView)</div><div class="editor-field"> @Html.EditorFor(model => model.ContentView) @Html.ValidationMessageFor(model => model.ContentView) @Html.DisplayDescriptionFor(model => model.ContentView)</div> </li> <li id="li_nav"><div class="editor-label"> @Html.LabelFor(model => model.Navigation)</div><div class="editor-field"> @Html.EditorFor(model => model.Navigation) @Html.ValidationMessageFor(model => model.Navigation) @Html.DisplayDescriptionFor(model => model.Navigation)</div> </li> <li><div class="editor-label"> @Html.LabelFor(model => model.Order)</div><div class="editor-field"> @Html.EditorFor(model => model.Order) @Html.ValidationMessageFor(model => model.Order) @Html.DisplayDescriptionFor(model => model.Order)</div> </li> <li><div class="editor-label"></div><div class="editor-field"> <input type="submit" value="添加" /></div> </li></ul> </fieldset>} </div></div><div class="clear"></div>@section Scripts { @Scripts.Render("~/bundles/jqueryval")}这里给一些<li>添加id属性,实现用户在显示不同的栏目类型的时候显示不同的项目。<script type="text/javascript">Details(); $("#Type").change(function () {Details(); }); function Details() {var v = $("#Type").val();if (v == "0") { $("#li_model").show(); $("#li_categoryview").show(); $("#li_contentview").show(); $("#li_nav").hide();}else if (v == "1") { $("#li_model").hide(); $("#li_categoryview").show(); $("#li_contentview").hide(); $("#li_nav").hide();}else if (v == "2") { $("#li_model").hide(); $("#li_categoryview").hide(); $("#li_contentview").hide(); $("#li_nav").show();} }</script>从浏览器中看一下。父栏目这里还有些问题,设想中这里应该是一个下拉框,用户可以选择已存在栏目类型为一般栏目的栏目做父栏目。这里需要下拉树形列表,设想中应该是这个样子,是一个下拉列表和属性列表框的组合框。
html中没有这种类型的控件,mcv4 中带的jquery UI是一个比较好的库,本身包含一定的控件,并且可以自己扩展,但是他缺少一些像,数据表(datagirdview),树形控件(tree),树形组合控件(combotree)等,且jqueryui的式样也不太好变换,决定丢弃jqueryui,而是用easyui(相对jqueryui功能更全面,更容易控制式样),在“引用”上点右键选择管理NuGet程序包

在已安装的包->全部,选择Jquery Ui点击卸载。
去http://www.jeasyui.com/选在最新版本,在项目的/Scripts文件夹中新建EasyUi文件夹,将easyui中的一下文件夹复制到该文件夹。
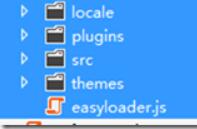
打开App_StartBundleConfig.cs,删除jqueryui相关项,添加
bundles.Add(new ScriptBundle("~/bundles/EasyUi").Include( "~/Scripts/EasyUi/easyloader.js")); bundles.Add(new StyleBundle("~/EasyUi/icon").Include("~/Scripts/EasyUi/themes/icon.css"));两项,使该文档看起来如下:
using System.Web;using System.Web.Optimization;namespace Ninesky{ public class BundleConfig {// 有关 Bundling 的详细信息,请访问 http://go.microsoft.com/fwlink/?LinkId=254725public static void RegisterBundles(BundleCollection bundles){ bundles.Add(new ScriptBundle("~/bundles/jquery").Include("~/Scripts/jquery-{version}.js")); bundles.Add(new ScriptBundle("~/bundles/EasyUi").Include("~/Scripts/EasyUi/easyloader.js")); bundles.Add(new ScriptBundle("~/bundles/jqueryval").Include("~/Scripts/jquery.unobtrusive*","~/Scripts/jquery.validate*")); // 使用 Modernizr 的开发版本进行开发和了解信息。然后,当你做好 // 生产准备时,请使用 http://modernizr.com 上的生成工具来仅选择所需的测试。 bundles.Add(new ScriptBundle("~/bundles/modernizr").Include("~/Scripts/modernizr-*")); bundles.Add(new StyleBundle("~/Skins/css").Include("~/Skins/Default/Style.css")); bundles.Add(new StyleBundle("~/Skins/usercss").Include("~/Skins/Default/User.css")); bundles.Add(new StyleBundle("~/Skins/ManageCss").Include("~/Skins/Default/Manage/Style.css")); bundles.Add(new StyleBundle("~/EasyUi/icon").Include("~/Scripts/EasyUi/themes/icon.css"));} }}这里会用到easyui的combotree。using System;using System.Collections.Generic;using System.Linq;using System.Web;namespace Ninesky.Models.Ui{ /// <summary> /// 树形控件数据 /// </summary> public class Tree {/// <summary>/// Id/// </summary>public int id { get; set; }/// <summary>/// 文本/// </summary>public string text { get; set; }/// <summary>/// 节点状态:"open"或"closed",默认"open"。/// </summary>public string state { get; set; }/// <summary>/// 图标/// </summary>public string iconCls { get; set; }/// <summary>/// 子节点/// </summary>public List<Tree> children { get; set; } }}打开~/Scripts/EasyUi/themes/icon.css文件 .icon-general {background: url("icons/ns_general.png") no-repeat !important; }切记一定记得加!important来调整css的优先级。easyui会将icon-general这个类添加在列表项的最后,如果不加这句"icons/ns_general.png"图标将不会显示。 
/// <summary>/// 栏目列表/// </summary>/// <param name="model">模型名称</param>/// <returns></returns>public IQueryable<Category> List(string model){ return dbContext.Categorys.Where(c => c.Model == model).OrderBy(c => c.Order);}/// <summary>/// 普通栏目树形类表/// </summary>/// <returns></returns>public List<Tree> TreeGeneral(){ var _root = Children(0, 0).Select(c => new Tree { id = c.CategoryId, text = c.Name, iconCls = "icon-general" }).ToList(); if (_root != null) {for (int i = 0; i < _root.Count(); i++){ _root[i] = RecursionTreeGeneral(_root[i]);} } return _root;}/// <summary>/// 普通栏目树形类表递归函数/// </summary>/// <param name="tree"></param>/// <returns></returns>private Tree RecursionTreeGeneral(Tree tree){ var _children = Children(tree.id, 0).Select(c => new Tree { id = c.CategoryId, text = c.Name, iconCls="icon-general" }).ToList(); if (_children != null) {for (int i = 0; i < _children.Count(); i++){ _children[i] = RecursionTreeGeneral(_children[i]);}tree.children = _children; } return tree;}打开CategoryController,添加一个 [JsonTreeParent()] 返回可以做父栏目的栏目树列表。#region json[AdminAuthorize]public JsonResult JsonTreeParent(){ categoryRsy =new CategoryRepository(); var _children = categoryRsy.TreeGeneral(); if (_children == null) _children = new List<Tree>(); _children.Insert(0, new Tree { id = 0, text = "无",iconCls="icon-general" }); return Json(_children);}#endregion打开ManageAdd.cshtml,将@Html.EditorFor(model => model.ParentId)改为<input id="ParentId" type="text" class="easyui-combotree" data-options="url:"@Url.Action("JsonTreeParent", "Category")"" value="0" /> . @section Scripts {@Styles.Render("~/EasyUi/icon")@Scripts.Render("~/bundles/EasyUi")@Scripts.Render("~/bundles/jqueryval")} OK,打开浏览器测试一下 
可以正常添加栏目。
今天发现一个问题无论父栏目宣布选什么,提交的ParentId为0,上面“打开ManageAdd.cshtml,将@Html.EditorFor(model => model.ParentId)改为<input id="ParentId" type="text" class="easyui-combotree" data-options="url:"@Url.Action("JsonTreeParent", "Category")"" value="0" /> .” 这里有问题,应改为:@Html.TextBox("ParentId",0,new {@class ="easyui-combotree",data_options="url:""+Url.Action("JsonTreeParent", "Category")+""" })。
修改后正常了,但是使用easyui combotree后,父栏目客户端验证无效了,这个是什么原因,如何解决,知道的朋友不吝赐教!
以上就是本文的全部内容,希望对大家的学习有所帮助,也希望大家多多支持脚本之家。