这次我们要分享的这款jQuery焦点图非常特别,它的外观特别简单,但是又相当大气。焦点图的整体样式是仿苹果样式的,由于jQuery的运用,我们只要点击图片下方的缩略图即可达到图片切换的焦点图特效,这款jQuery焦点图插件非常适合在产片展示的网页上使用。
接下来我们一起分享一下实现这款苹果焦点图的过程及源码。
HTML代码:
复制代码 代码如下:
<div id="gallery">
<div id="slides" style="width: 3680px; margin-left: 0px;">
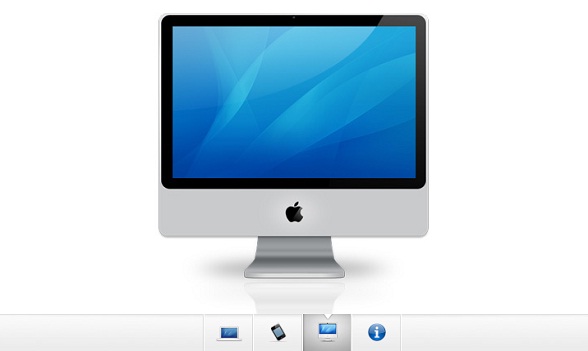
<div class="slide"><img width="920" height="400" alt="side" src="img/sample_slides/macbook.jpg"></div>
<div class="slide"><img width="920" height="400" alt="side" src="img/sample_slides/iphone.jpg"></div>
<div class="slide"><img width="920" height="400" alt="side" src="img/sample_slides/imac.jpg"></div>
<div class="slide"><a target="_blank" href="http://tutorialzine.com/2009/10/beautiful-apple-gallery-slideshow/"><img width="920" height="400" alt="side" src="img/sample_slides/info.jpg"></a></div>
</div>
<div id="menu">
<ul>
<li class="fbar inact"> </li><li class="menuItem inact act"><a href=""><img alt="thumbnail" src="img/sample_slides/thumb_macbook.png"></a></li><li class="menuItem inact"><a href=""><img alt="thumbnail" src="img/sample_slides/thumb_iphone.png"></a></li><li class="menuItem inact"><a href=""><img alt="thumbnail" src="img/sample_slides/thumb_imac.png"></a></li><li class="menuItem inact"><a href=""><img alt="thumbnail" src="img/sample_slides/thumb_about.png"></a></li>
</ul>
</div>
</div>
从以上HTML代码可以看出,整个焦点图由一些div构成图片容器,用ul li列表构成下面的缩略图。
CSS代码:
复制代码 代码如下:
#gallery{
/* CSS3 Box Shadow */
-moz-box-shadow:0 0 3px #AAAAAA;
-webkit-box-shadow:0 0 3px #AAAAAA;
box-shadow:0 0 3px #AAAAAA;
/* CSS3 Rounded Corners */
-moz-border-radius-bottomleft:4px;
-webkit-border-bottom-left-radius:4px;
border-bottom-left-radius:4px;
-moz-border-radius-bottomright:4px;
-webkit-border-bottom-right-radius:4px;
border-bottom-right-radius:4px;
border:1px solid white;
background:url(img/panel.jpg) repeat-x bottom center #ffffff;
/* The width of the gallery */
width:920px;
overflow:hidden;
}
#slides{
/* This is the slide area */
height:400px;
/* jQuery changes the width later on to the sum of the widths of all the slides. */
width:920px;
overflow:hidden;
}
.slide{
float:left;
}
#menu{
/* This is the container for the thumbnails */
height:45px;
}
ul{
margin:0px;
padding:0px;
}
li{
/* Every thumbnail is a li element */
width:60px;
display:inline-block;
list-style:none;
height:45px;
overflow:hidden;
}
li.inact:hover{
/* The inactive state, highlighted on mouse over */
background:url(img/pic_bg.png) repeat;
}
li.act,li.act:hover{
/* The active state of the thumb */
background:url(img/active_bg.png) no-repeat;
}
li.act a{
cursor:default;
}
.fbar{
/* The left-most vertical bar, next to the first thumbnail */
width:2px;
background:url(img/divider.png) no-repeat right;
}
li a{
display:block;
background:url(img/divider.png) no-repeat right;
height:35px;
padding-top:10px;
}
a img{
border:none;
}
CSS代码也非常简单,都是一些简单设置而已。
jQuery代码:
复制代码 代码如下:
$(document).ready(function(){
/* This code is executed after the DOM has been completely loaded */
var totWidth=0;
var positions = new Array();
$("#slides .slide").each(function(i){
/* Traverse through all the slides and store their accumulative widths in totWidth */
positions[i]= totWidth;
totWidth += $(this).width();
/* The positions array contains each slide"s commulutative offset from the left part of the container */
if(!$(this).width())
{
alert("Please, fill in width & height for all your images!");
return false;
}
});
$("#slides").width(totWidth);
/* Change the cotnainer div"s width to the exact width of all the slides combined */
$("#menu ul li a").click(function(e,keepScroll){
/* On a thumbnail click */
$("li.menuItem").removeClass("act").addClass("inact");
$(this).parent().addClass("act");
var pos = $(this).parent().prevAll(".menuItem").length;
$("#slides").stop().animate({marginLeft:-positions[pos]+"px"},450);
/* Start the sliding animation */
e.preventDefault();
/* Prevent the default action of the link */
// Stopping the auto-advance if an icon has been clicked:
if(!keepScroll) clearInterval(itvl);
});
$("#menu ul li.menuItem:first").addClass("act").siblings().addClass("inact");
/* On page load, mark the first thumbnail as active */
/*****
*
* Enabling auto-advance.
*
****/
var current=1;
function autoAdvance()
{
if(current==-1) return false;
$("#menu ul li a").eq(current%$("#menu ul li a").length).trigger("click",[true]); // [true] will be passed as the keepScroll parameter of the click function on line 28
current++;
}
// The number of seconds that the slider will auto-advance in:
var changeEvery = 10;
var itvl = setInterval(function(){autoAdvance()},changeEvery*1000);
/* End of customizations */
});
这是焦点图的重点,完成了图片滑块的动画逻辑,点击缩略图即可切换图片。